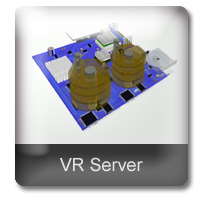
VR Server
Simulates a server
Camboard Technology
Computer science software for k12 and ks3 computing curriculum..
Key Features
Simulates how a server works
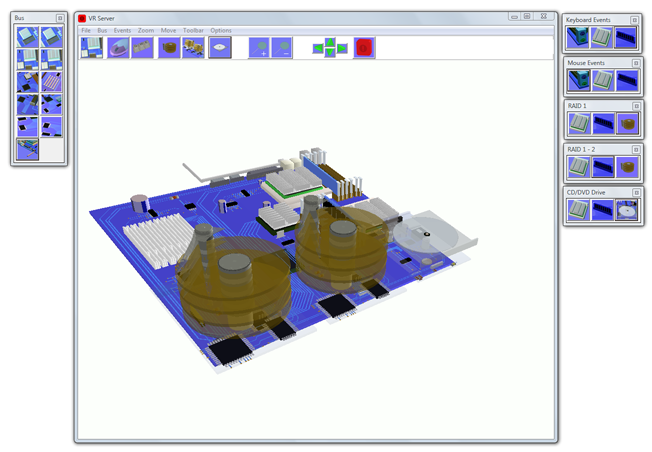
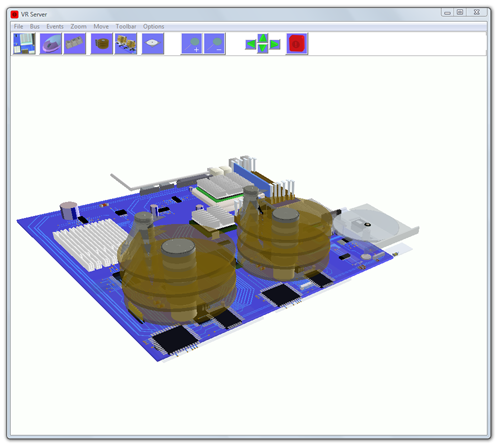
Computer science software for k12 curriculum. The program is a great introduction to the inner workings of a how a server works. VR Server simulates the main processes of a working Server. The 3D realistic parts of the servers motherboard, 2 X CPU, 2 X RAID hard disk drives, LAN and cd/dvd drive are all simulated. Students can see how a server works. The servers main systems are simulated. The motherboard can be rotated and moved, you can zoom in onto the motherboard to see simulations close up. VR Server is a powerful simulation of the main processes involved in running applications and using hardware on a Windows server, Great for use with computer science and computing curriculum.
VR Server simulates these events..
Mouse Events
Mouse to I/O
The mouse port connects to the LPC I/O controller.
Mouse to CPU 1
1.The mouse port connects to the LPC I/O controller.
2. Data is moved to the south bridge and then to the north bridge.
3. From here data is transferred into CPU 1.
Mouse to Memory
1.The mouse port connects to the LPC I/O controller.
2. Data is moved to the south bridge and then to the north bridge.
3. From here data is transferred into CPU 1.
4. Data is then transferred into memory.
Keyboard Events
Keyboard to I/O
The keyboard port connects to the LPC I/O controller.
Keyboard to CPU 1
1.The keyboard port connects to the LPC I/O controller.
2. Data is moved to the south bridge and then to the north bridge.
3. From here data is transferred into CPU 1.
4. Data is then transferred into memory.
Keyboard to Memory
1.The keyboard port connects to the LPC I/O controller.
2. Data is moved to the south bridge and then to the north bridge.
3. From here data is transferred into CPU 1.
4. Data is then transferred into memory.
RAID 1
RAID 1 (Read) to CPU 1
1.The arms move over the platters of RAID 1 hard disk. Data is read and transferred through the E-IDE controller.
2. Data is then sent to the south bridge and onto the north bridge.
3. From here data is transferred into CPU 1.
RAID 1 (Read) to Memory
1. The arms move over the platters of RAID 1 hard disk. Data is read and transferred through the E-IDE controller.
2. Data is then sent to the south bridge and onto the north bridge.
3. From here data is transferred into CPU 1.
4. The CPU moves the data into memory.
RAID 1 (Read)
1.The arms move over the platters of RAID 1 hard disk.
Data is read and transferred through the E-IDE controller.
RAID 1 - RAID 2
RAID 1 - 2 (Write) from CPU 1
1. Data is transferred into CPU 1.
2. Data is then sent to the north bridge and onto the south bridge.
3. Data is transferred to both RAID hard disk drives where the arms move over onto the platters and write data.
RAID 1 - 2 (Write) from Memory
1. Data is read in from memory.
2. From here data is transferred into CPU 1.
3. Data is then sent to the north bridge and onto the south bridge.
4. Data is transferred to both RAID hard disk drives where the arms move over onto the platters and write data.
RAID 1 - 2 (Write)
1. Data is transferred to both RAID hard disk drives where the arms move over onto the platters and write data.
CD/DVD
CD (Read) to CPU 1
This simulates data being read from the CD.
1.The laser is switched on to read data from a specific location.
Data is then transferred to the CD controller which sits under the laser.
A ribbon cable (not shown) connects the controller to the IDE slot on the motherboard.
2.Data moves through the IDE slot to the south bridge.
3.Data then travels to the north bridge and onto CPU 1.
CD (Read) to Memory
This simulates data being read from the CD.
1.The laser is switched on to read data from a specific location.
Data is then transferred to the CD controller which sits under the laser.
A ribbon cable (not shown) connects the controller to the IDE slot on the motherboard.
2.Data moves through the IDE slot to the south bridge.
3.Data then travels to the north bridge and onto CPU 1.
4.The CPU moves the data into memory.
CD (Read)
The laser is switched on to read data from a specific location.
Data is then transferred to the CD controller which sits under the laser.
A ribbon cable (not shown) connects the controller to the IDE slot on the motherboard.

System Requirements
Requires a PC or laptop
With Windows XP/VISTA/7/8/10 and DirectX 8.1 or higher.